
So, you've successfully activated the storefront sections and set up dynamic pricing. It's now time to take the exciting next step of launching your first promotion. This guide will walk you through the process, using Shopify discounts as an example.
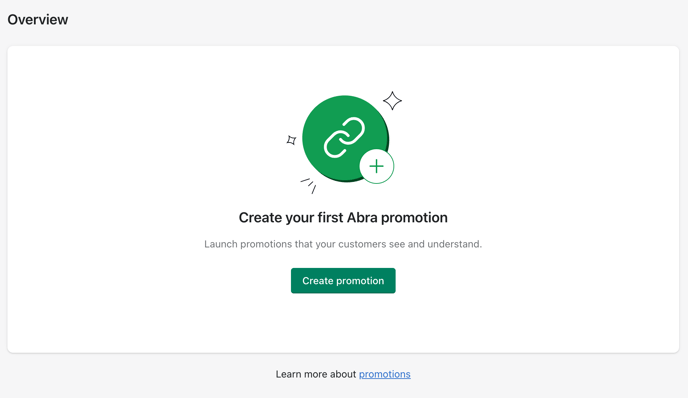
- Navigate to the Abra Overview screen, and click the Create promotion button in the middle of the empty overview table.
- You will be taken to the Promotion form. Here, you'll outline your offer, define storefront blocks, and input promotional content.
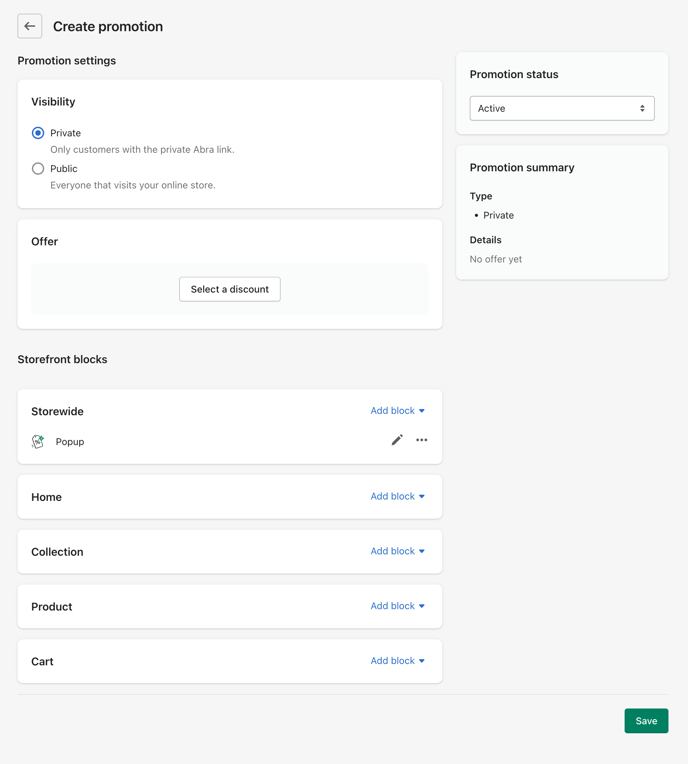
- Determine your promotion Visibility.
Depending on the exclusivity of your offer, choose between a Private or Public promotion visibility.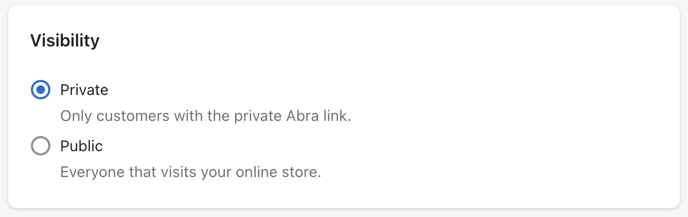
A Private promotion will only be visible to customers that receive a private Abra link for this promotion. This link is generated once you save your promotion, and can be shared with your customers through email campaigns, social media campaigns, and ads. This type of a promotion will be activated once your customer clicks on the link shared with them. You can have multiple private promotions running at the same time.
A Public promotion will be automatically activated and visible to anyone visiting your online store. Think of this promotion like Shopify’s automatic discounts, but with more magic. Because of the nature of this promotion being public, you can only run one public promotion at a time.
Use case:
Consider a Black Friday campaign where you would have a general discount of 20% for anyone shopping on your store (Public promotion), and a larger 25% discount for your loyal email subscribers (Private promotion).
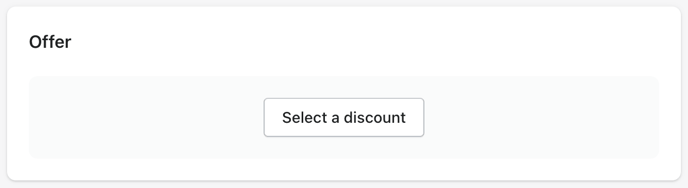
Select your Offer
This is where you will define the value of your promotion by selecting a Shopify discount.
Important:
When creating a Shopify discount to use in an Abra promotion, it is important to remember not to save it as an automatic discount as it will override any promotion. Additionally, avoid choosing discounts that involve combinations.
- Click Select a discount button, and then select an Offer type in the modal.
Use the modal select one of the discounts you created in your Shopify admin. You can choose between a product discount and an order discount.
When creating your discount codes to use with Abra, keep in mind how you want to present your pricing changes with Dynamic pricing.
A Product discount will allow your customers to see discounted product prices throughout their shopping journey, and will appear as line item discounts in their cart and checkout.
An Order discount will apply to the whole order and will be visible to your customers as a total discount in their cart and checkout.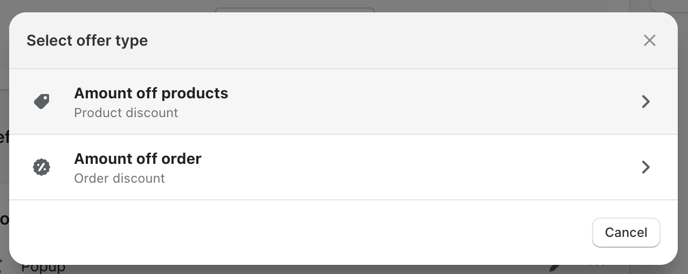
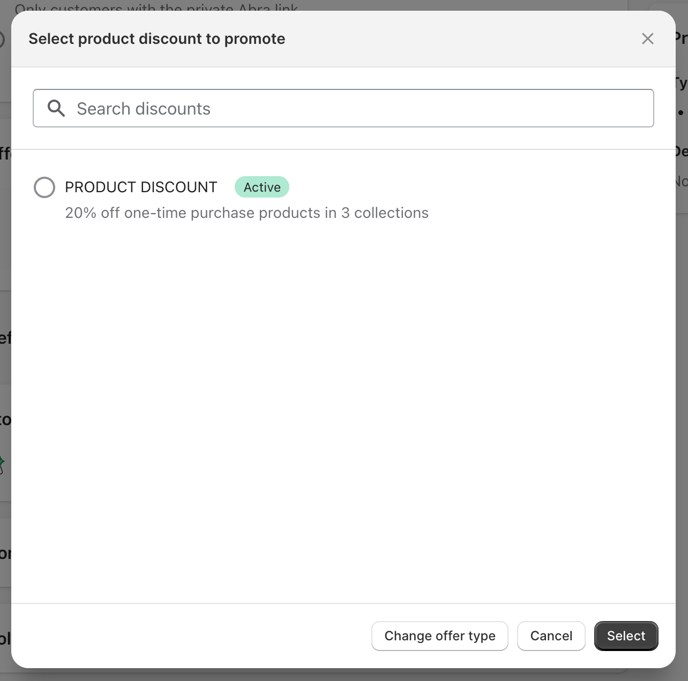
- Select a Shopify discount to add to your promotion.
Important:
Always check to make sure the discount you have selected is Active. If the discount is scheduled or expired, then your promotion will not activate.
Voilà, your discount offer is now added to your promotion!

Helpful tip:
It is good practice to Save your promotion as you are building it to avoid any of your changes to be lost.
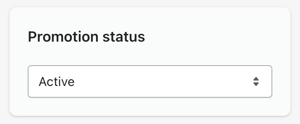
If you’re not ready to publish your promotion—mostly applies for Public promotion visibility—you can change your promotion status to Draft. Once you have built your promotion, you can change the status to Active and save your changes.
Just remember to change your promotion status to Active before communicating it with your customers.
Edit your Storefront block’s content
When creating a promotion, you will notice that there is already a Popup block that was automatically added to your promotion. This Storewide block acts as a notification popup that lets your customers know that their promotion has been activated and their discount is applied.
- To start editing your block’s content, click on the Pencil icon.

- An Edit content modal will open up, allowing you to edit your promotional messaging along with selecting an icon to go along your message.
When editing your message, you can make use of variables to make the messaging dynamic for any promotion you may run. We recommend keeping the message clear and concise so your customer gets it right away.
The Preview at the bottom of the modal shows you what your customers will see when this promotion is activated.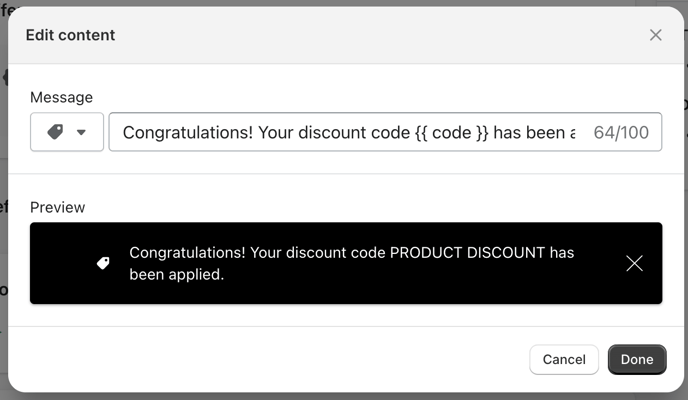
- Once you’re done editing your content, click the Done button at the bottom right to save your changes.
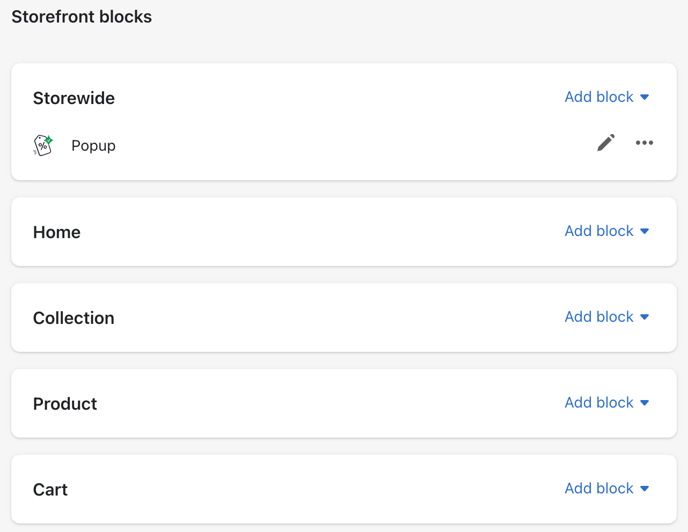
Add a Storefront block
Storefront blocks are your bread and butter when it comes to launching your promotion and communicating to customers the value of savings they will receive.
We have organized storefront blocks into 5 main areas to help you picture your promotion in context of the customer shopping journey.
By default, Abra incorporates a Popup block to every promotion you create. This is because popups are an effective way to notify customers of an active promotion.
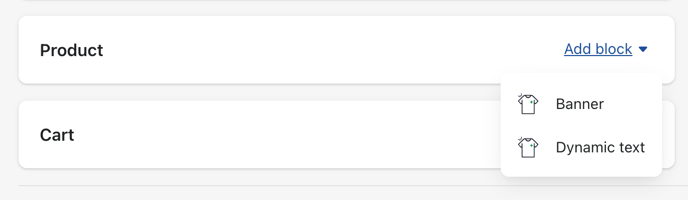
- Start by clicking Add block call to action for the Product section.

- Next, select Banner to add a banner to your product template.
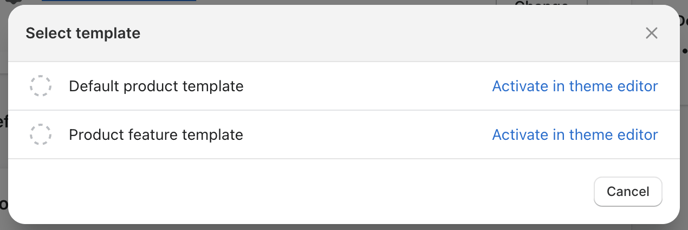
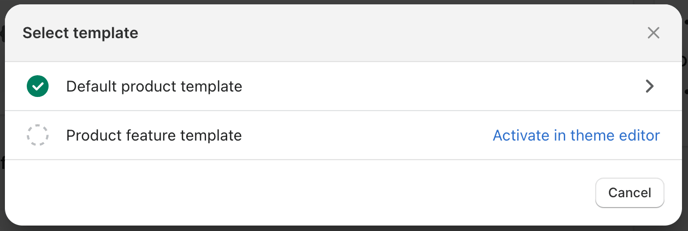
- Pick a Template that you would like to add this Banner to.
Your theme may have multiple template versions, or you may have created new ones for specific uses. When selecting a template, make sure that you select the template that is used on the products you want your customers to see. Additionally, you can add Banners to multiple templates.
When adding a banner to a template for the first time, you will be prompted to Activate a storefront block in the theme editor. When activating the block in the theme editor, you will be able to customize the look and feel of it.
- Activate Banner block in theme editor by clicking Activate in theme editor call to action.
- Position and customize the Banner block on your product page.
Once you click to activate, you will be guided to the theme editor with a helpful tool tip showing where the Abra block was added (“Banner” added).
Here you can drag the block to place it exactly where you want.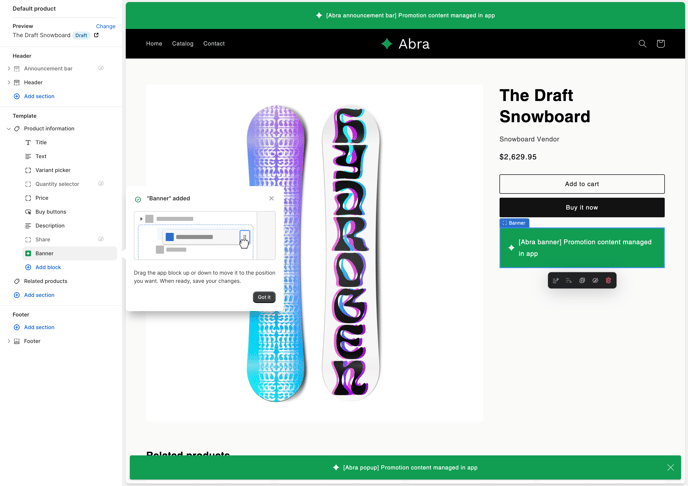
- Customize the look and feel of your block.
Clicking the Banner block will open up the settings pane where you can customize the look and feel of your block.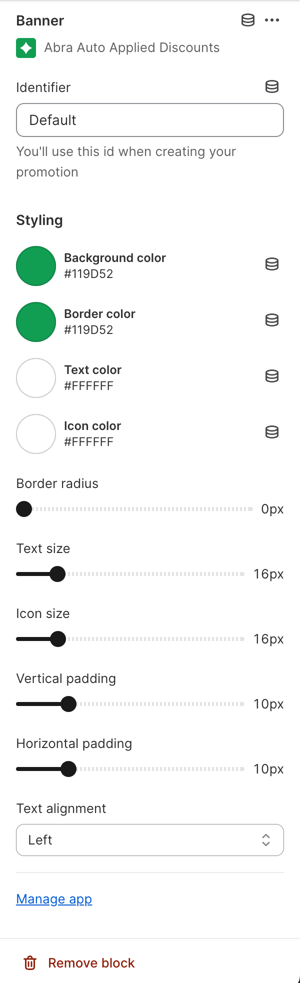
- Click Save to confirm your changes and return to the promotion form. Your newly activated template is now ready to be used.
- You can now close the theme editor window and return to your promotion form.
- On your promotion form window, select the activated product template in the open modal to start editing your promotional content.
Storefront block’s More menu

Clicking the more icon (•••) next to the pencil icon will show an option list with two additional options:
- Clicking Manage in theme editor will take you directly to edit the presentation settings for this block in your theme editor.
- Clicking Remove will remove the block from your promotion.
Understanding your Promotion summary
Similarly to the discount summary, we added a promotion summary to give you an at-a-glance view of the offer your customers are getting.

Here you are able to see the discount code linked to your promotion. It shows you the last time it was synced with Shopify to make sure all the changes have been reflected. There is a manual Sync button in the top right corner if you want to sync any changes manually.
Visibility and Offer sections summarize the details of your promotion and discount.
Saving your promotion

Once you’re done making changes to your promotion, click the Save button in the top right of your Shopify action bar, or at the bottom right of your promotion screen.
You will see a green success banner that will prompt you to copy your promotion link or to change landing page destination.
- Click to Copy link so you can share it with your customers, use it in your social media, email or advertising campaigns.
You can also click the Copy link in the promotion action bar in the top right corner. - Click to Change landing page if you want to link to a specific product or a collection before sharing with your customers.
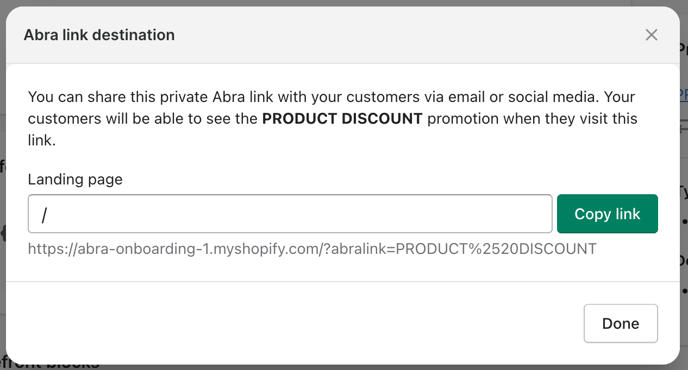
You can also change your promotion link destination by clicking Share in the promotion action bar in the top right corner that will bring up the same modal. - After your promotion is saved, it is ready to Preview. Click the Preview button in the promotion action bar in the top right corner to see how your promotion will appear to your customers.
Congratulations, you have created your first promotion!
Helpful tip:
Pin the app to your navigation for quick and easy access in the future directly from the Shopify navigation.
